Darktable vs Camera JPG: why are the colors different?
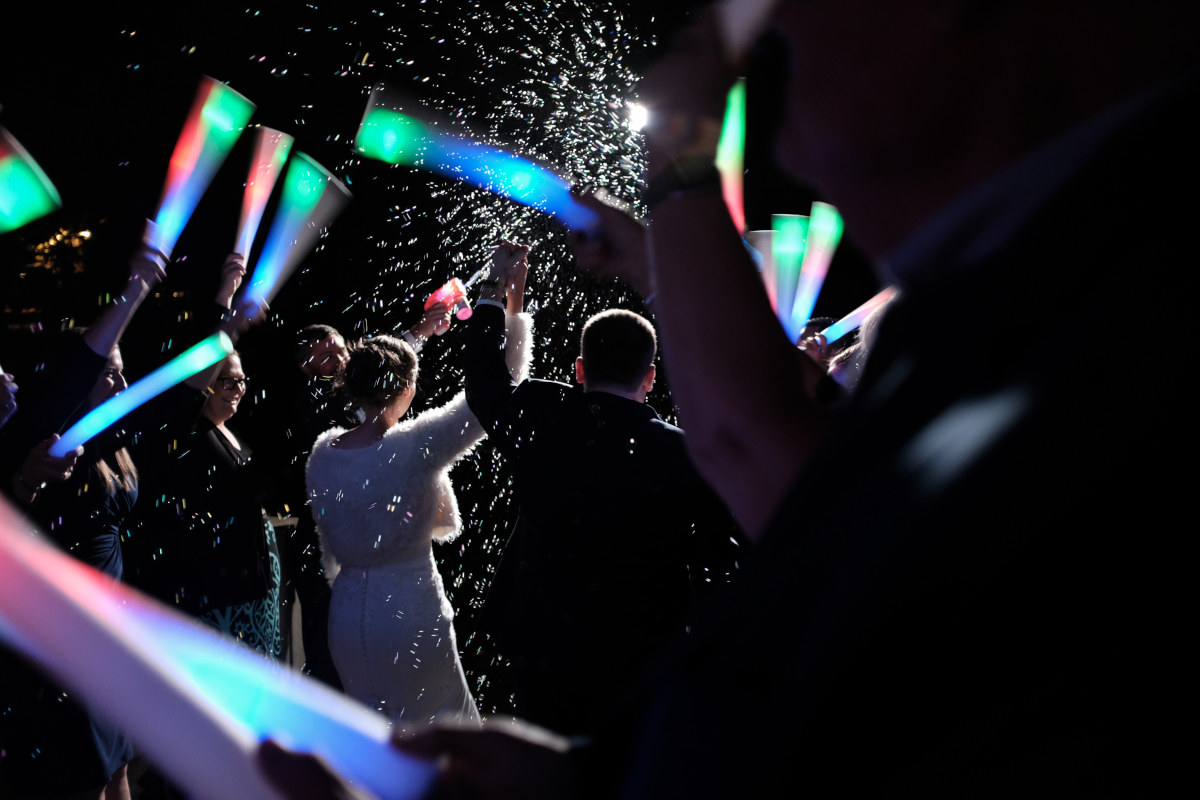
Straight out of camera JPG, Fuji X100F
Color is weird, it only really exists in our heads and there has been many tomes written about how to represent it and how to process it, especially in digital imaging. Something that seems to come up often with RAW photo processors in general and Darktable in particular is around why the colors end up looking so different compared to what the camera produces in a JPG.
Above is a JPG straight out of my Fuji X100F on the Classic Chrome setting. It looks nice, but there's a problem brewing. Looking at the LED light sticks one notices a very cyan or teal colored center in the blue LED section. These were very cheap LED light sticks and contained one red, one blue and one green LED as far as I could tell. LEDs are generally a very narrow spectrum light source too, individual LEDs only produce a very specific wavelength of the visible spectrum so it's impossible for this single blue LED to produce teal or cyan. White LEDs can be made by mixing several different color LEDs together behind a diffuser or with a UV LED and a flourescent coating. But the regular low cost LEDs in applications like these are most definitely not those, so where's that cyan coming from?
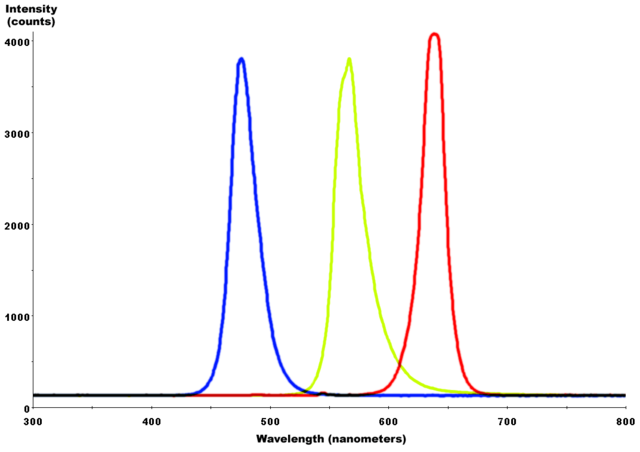
Typical spectral output of blue, green and red LEDs respectively. Notice how narrow the spectral bandwidth and how high the peaks are.
Things only get more confusing once the RAW file is loaded into Darktable.
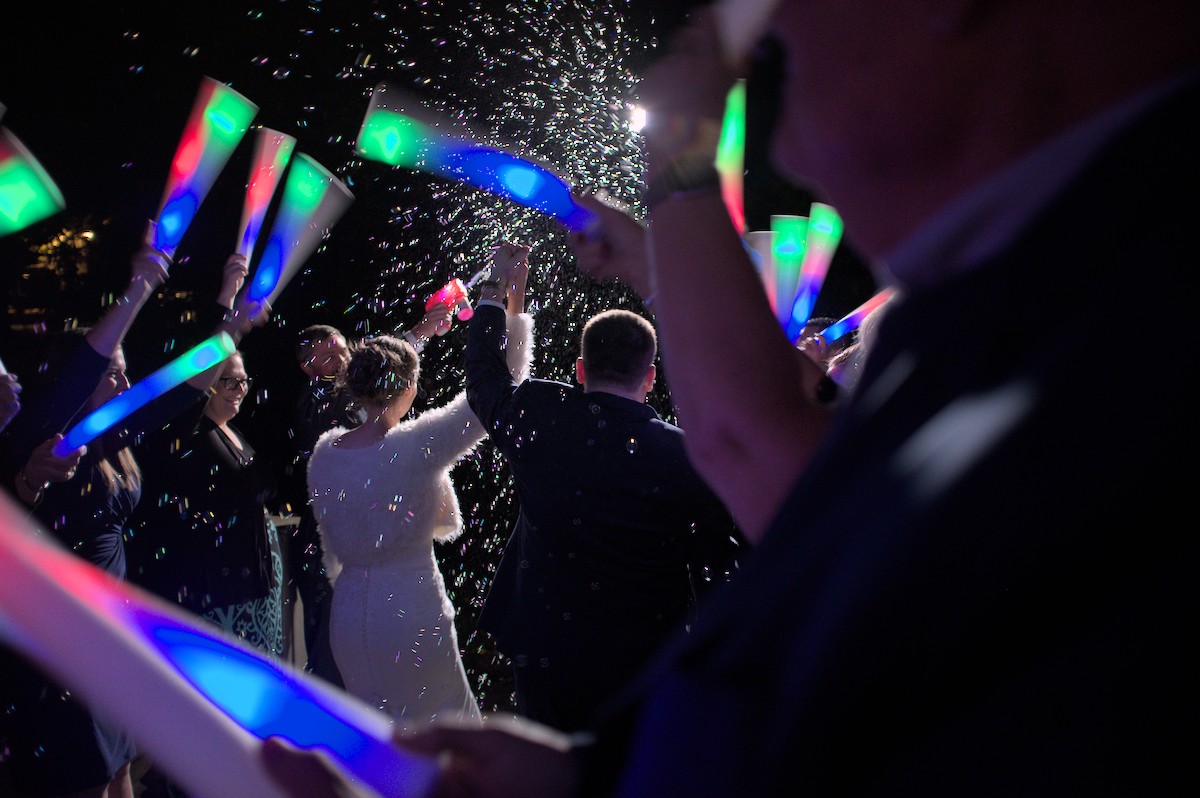
Default Darktable 4.4 processing, Filmic v7
Gone are the teals and cyans but now now there's this harsh blue gradient. Frankly it looks like garbage. "Good grief, hoodwinked again, I guess you get what your pay for, it's free so it can't be good" one might think. Except that in this case Darktable is showing you the more technically correct representation.
If one were to think about the color property of shade and draw out dark shades of a blue to a light shade of blue it might look something like below. As the color lightens up it get progressively closer to white until it falls into pure white. There's not a pixel of cyan or teal in that strip of color below. Those are different hues and cannot fall out of a purely blue light source by just increasing the exposure.

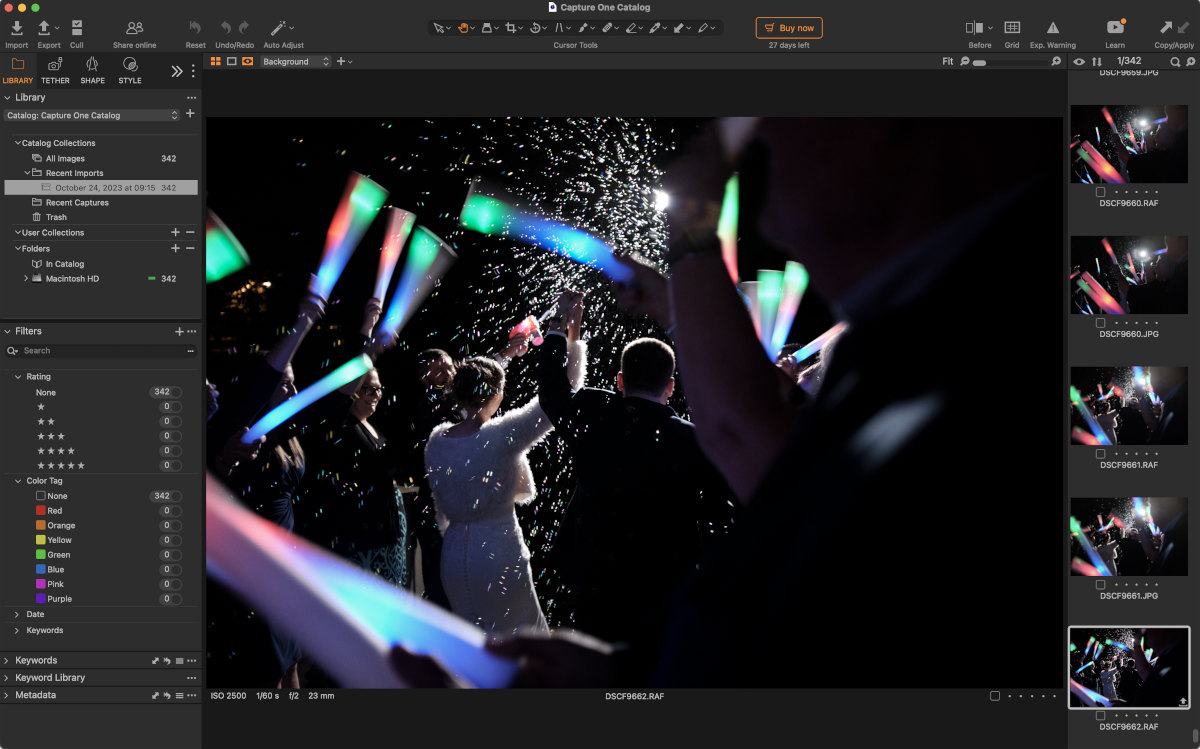
Loading the file into Capture One, Fuji's RAW processor of choice, yields very similar results to the Fuji JPG too.
Yes, I just used the trial version.
Considering Fuji apparently works with Capture One and probably shares information about their curves and JPG processing I would expect it to closely match. I don't have an Adobe subscription so I cannot test that, from what I can tell they don't allow Adobe Camera RAW to be used standalone anymore either.
So, does this mean that the professional software and thousand dollar camera is lying to you? Well, possibly, it depends on how you look at it but Fuji have certainly made some decisions for you in their processing. What they are doing is clipping the blue channel and causing a hue shift or hue rotation.
This is all well and good but technically correct and ugly is still ugly. I don't disagree, the Fuji JPG output is more pleasing in my opinion as I find the jarring, harsh blue gradient to be distracting. So let's fix it in Darktable.
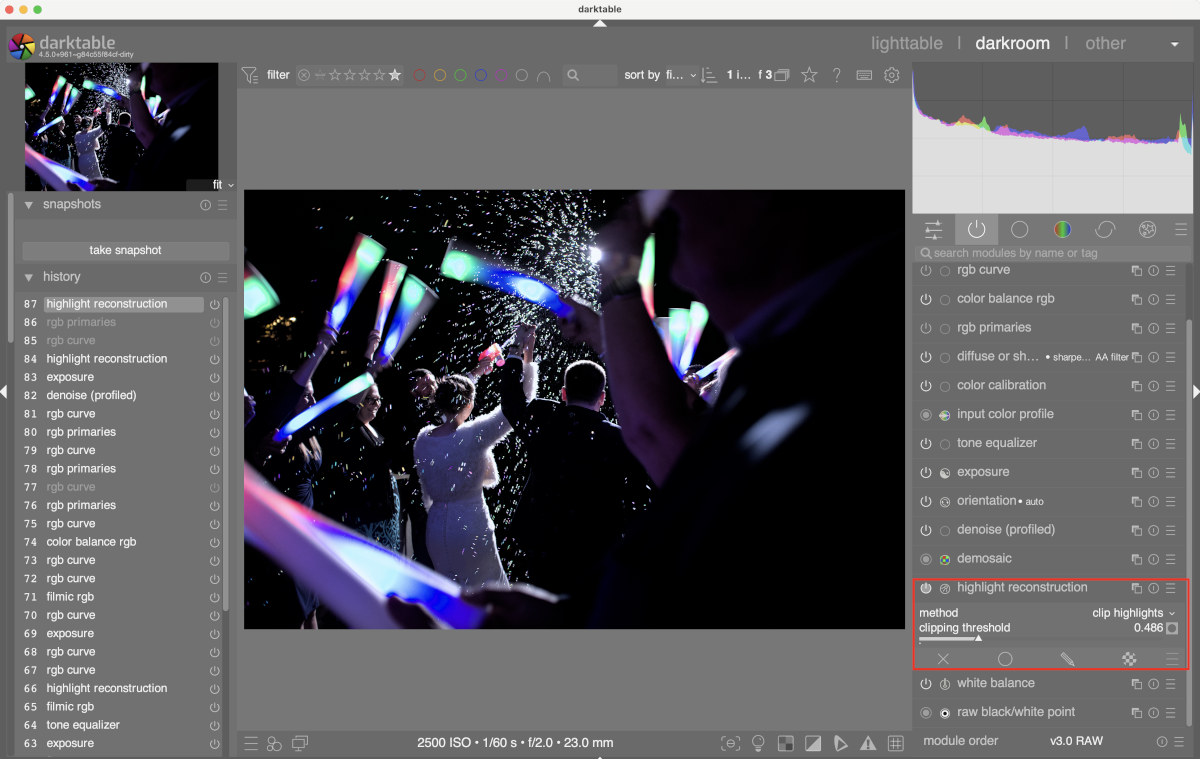
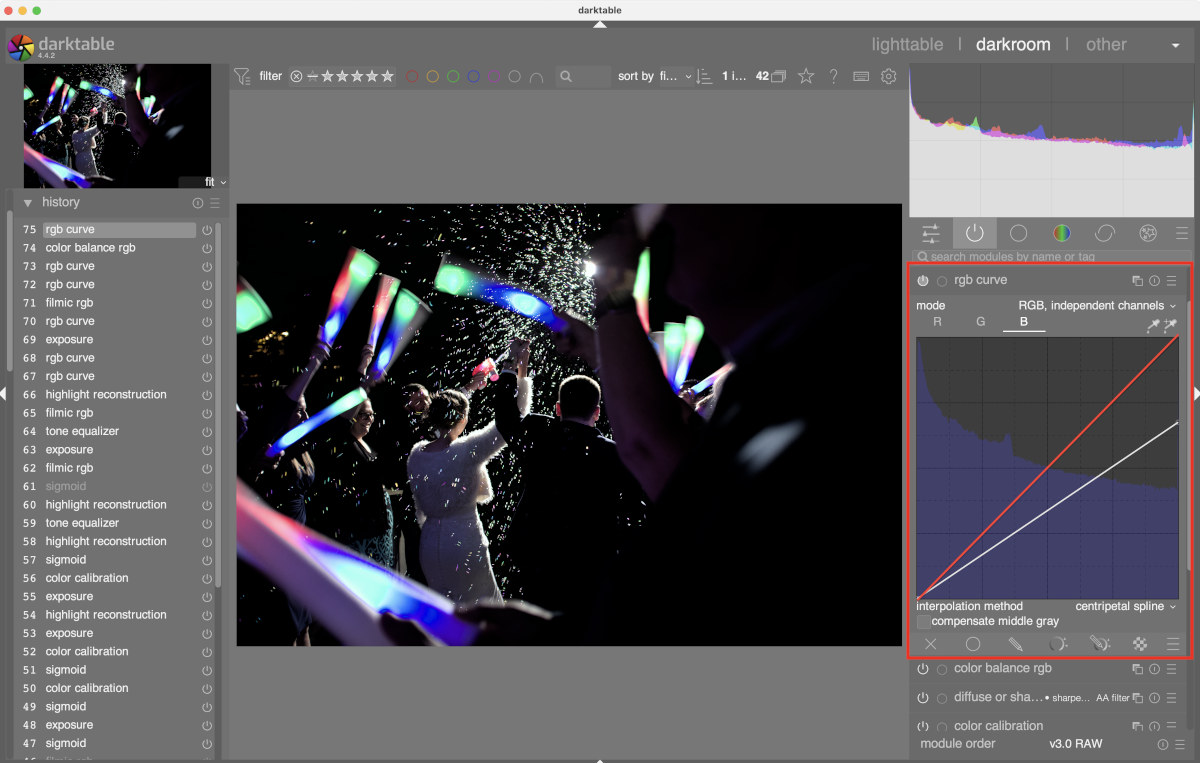
First, find the highlight reconstruction module and change the mode from inpaint opposed to clip highlights, then adjust the clipping threshold down until the blue highlights begin to turn cyan. I found a value of about 0.4-0.5 worked well.
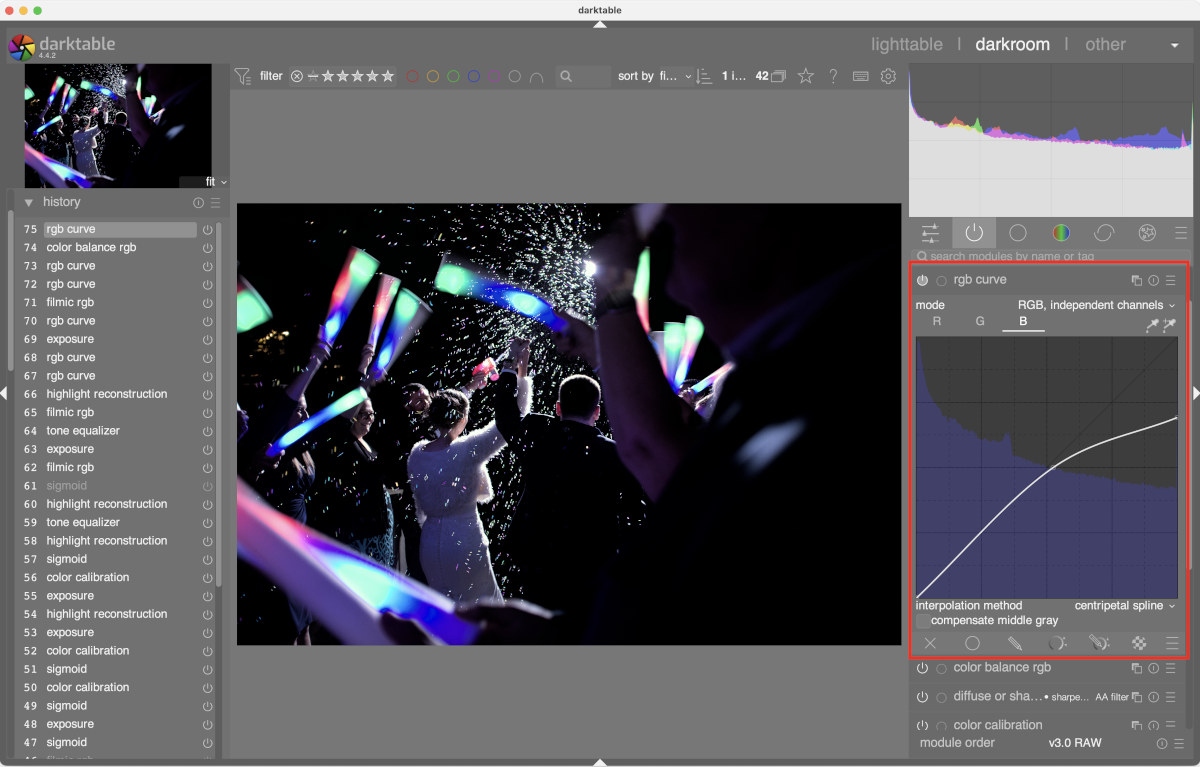
Next, find the rgb curve module and change the mode to RGB, independent channels, click on the blue channel and drag the right end of the curve down the right hand side of the module window. In this screen shot the red line represents the standard linear fit that the module starts out with. Everything between that and the white line that is pulled down has now been clipped from the image. The desired effect is achieved when the cyan or teal starts to intensify.
Then even out the curve by adding a few more points so that the gradients are smoother and less jarring. This is most noticeable in the darker parts of the cyan to blue gradient but it's still very subtle.
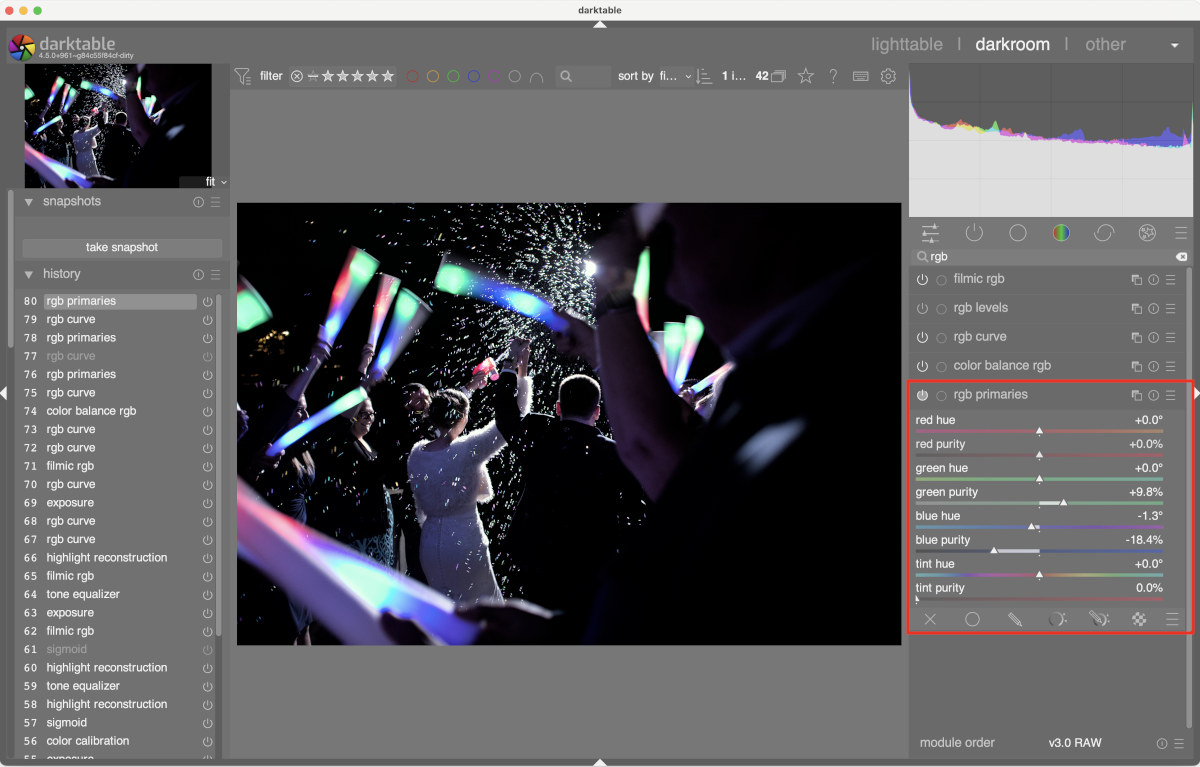
This gets the image about 90% of the way there. As a finishing step, use the rgb primaries module in the new development version of Darktable to "contaminate" the blues with some green. This new module will be available in the full 4.6 release this December. Please note that since GitHub doesn't have ARM Mac runners right now the Mac nightly build is X86_64 only. The full releases have a native ARM version and GitHub is allegedly adding ARM Mac build hosts this fall or winter. I compiled my own from from the Darktable source for Apple ARM.
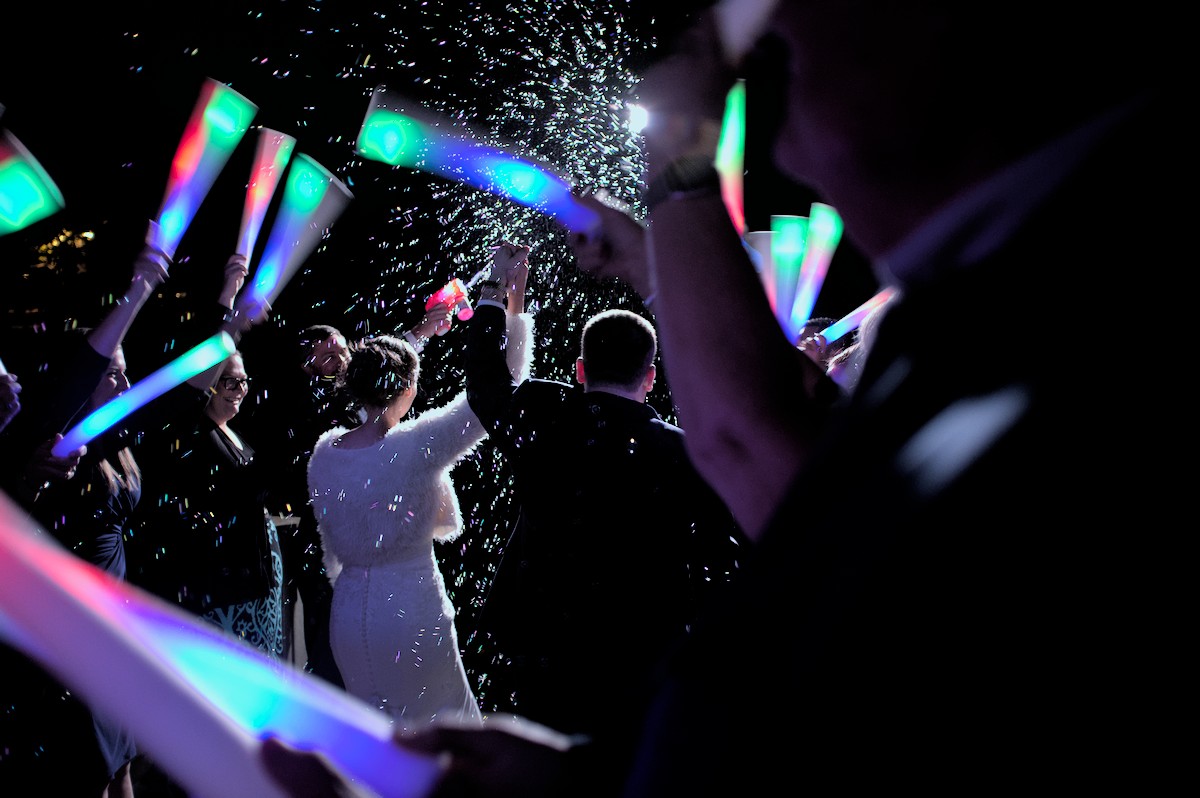
After some other tweaks the image is ready for export and it's close enough to the Fuji's out of camera color treatment.
This begs the question: why not use the Fuji JPG and skip this whole business? That's a good point and if one is happy with the JPG output then that's fine. The problem comes when or if the camera does something that looks bad. Its image processor is applying a standard curve and treatment to a wide array of situations and it might not always nail it. With the RAW it's easier to adjust things in post. These days I usually shot RAW+JPG on my Fuji gear specifically because their JPG engine is just that good, but there are times when I need the malleability of the RAW. Knowing how the camera and imaging pipeline works is handy in a situations like that. Just remember that the camera JPG is not the canonical version of an image and don't get caught up in trying to represent reality exactly. Yes, the bright blue LEDs rendered by default in Darktable are closer to reality but they are ugly as sin. Hue shifting out to a softer more pastel color works well for this image. Also, trying to exactly duplicate the camera JPG is a bit of a fool's errand. It's like trying to reverse engineer a cake. It's not too difficult to get close but without an exact recipe it will never be exact.
